Reconstructing a 3D model using aerial drone images requires taking images with a certain degree of overlap (80-90%) between neighboring images.
Automatic flight applications that collect images with a set overlap ratio are useful, but sometimes that overlap ratio is not sufficient and the 3D reconstruction does not work.
If a video, a continuous sequence of images, is captured, it is possible to flexibly extract the images from the video.
As a pre-processing step for 3D model development, free software "VLC media player" or "VideoProc Converter" or a website for converting the movie to images can be used to automatically clip images from videos.
I recommend using "VLC media player", which allows you to specify the image to be cropped by the number of frames instead of the number of seconds.
Here is how it is done.
ドローンの空撮画像を用いて3Dモデルを再構築するには、ある程度以上の隣接する画像の重なりを保ったまま(80-90%が必要とされます)で画像を撮影する必要があります。
設定した重なり率で画像を収集する自動飛行アプリケーションは便利ですが、その重なり率が十分でないと、3D再構成がうまくいかないことがあります。
連続した画像からなる動画を撮影しておけば、動画から柔軟に画像を抽出することが可能です。
3Dモデル開発の前処理として、フリーソフトVLC media playerやVideoProc Converter、a website for converting the movie to imagesを利用して動画から画像を自動的に切り出すことができます。
VLC media player "を使うと、切り取る画像を秒数ではなくフレーム数で指定することができるので、おすすめです。
以下はその方法を紹介します。
A website for converting the movie to images
動画から画像を切り出せるウェブサイト
以下のサイトの指示に従って行ってください。
You can follow the instruction on the following website.
VLC media player
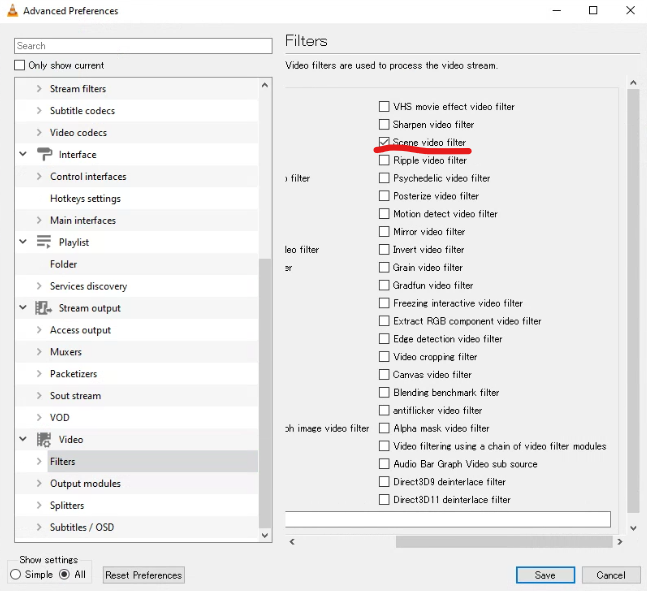
- Tools->Preferences

- click "All"

- click ">" next to "Filters" in "Video"

- click "Scene filter"

Here, you can select;
the image format: jpg or png.
Image width and Image height: -1 means the same size as the original file.
Filename prefix: the name of the common part of the output images. The output file name will be the value specified here, followed by a 5-digit frame number (starting from "00001″).
Directory path prefix: the name of the directory of the folder where the output images are saved. A folder must be created in advance.
Always write to the same file: Unchecked.
Recording ratio: Specify how many frames to capture an image. For example, for a video recorded at 30 FPS (frames per second), if 15 is specified here, two images will be captured every second. You can check the FPS of a video from its properties -> "details".
ここで、以下の項目を選択することができます。
画像形式:jpgまたはpng
画像の幅と高さ: -1はオリジナルファイルと同じサイズを意味します。
ファイル名プレフィックス:出力画像の共通部分の名前です。出力ファイル名は、ここで指定した値の後に、5桁のフレーム番号("00001″から始まる)を付けたものになります。
ディレクトリパスのプレフィックス:出力画像を保存するフォルダのディレクトリ名です。あらかじめフォルダーを作成しておく必要があります。
常に同じファイルに書き込む: チェックをはずす。
記録比率: 何フレームで画像を取り込むかを指定します。例えば、30FPS(frames per second)で記録された動画の場合、ここで15を指定すると、1秒間に2枚の画像をキャプチャすることになります。動画のFPSは、動画のプロパティ→「詳細」から確認することができます。

After setting up, click "Save".
- Tools->Preferences
- click "All"
- Move to "Filters" and check "Scene video filter"
After setting up, click "Save".
- Close "VLC media player" and open it again.
- Drug and release a video file on the software to run the process.
VideoProc Converter
【公式】VideoProc Converter - かなり使える多機能動画処理ソフト|動画変換・録画ならVideoProc Converterにお任せ!
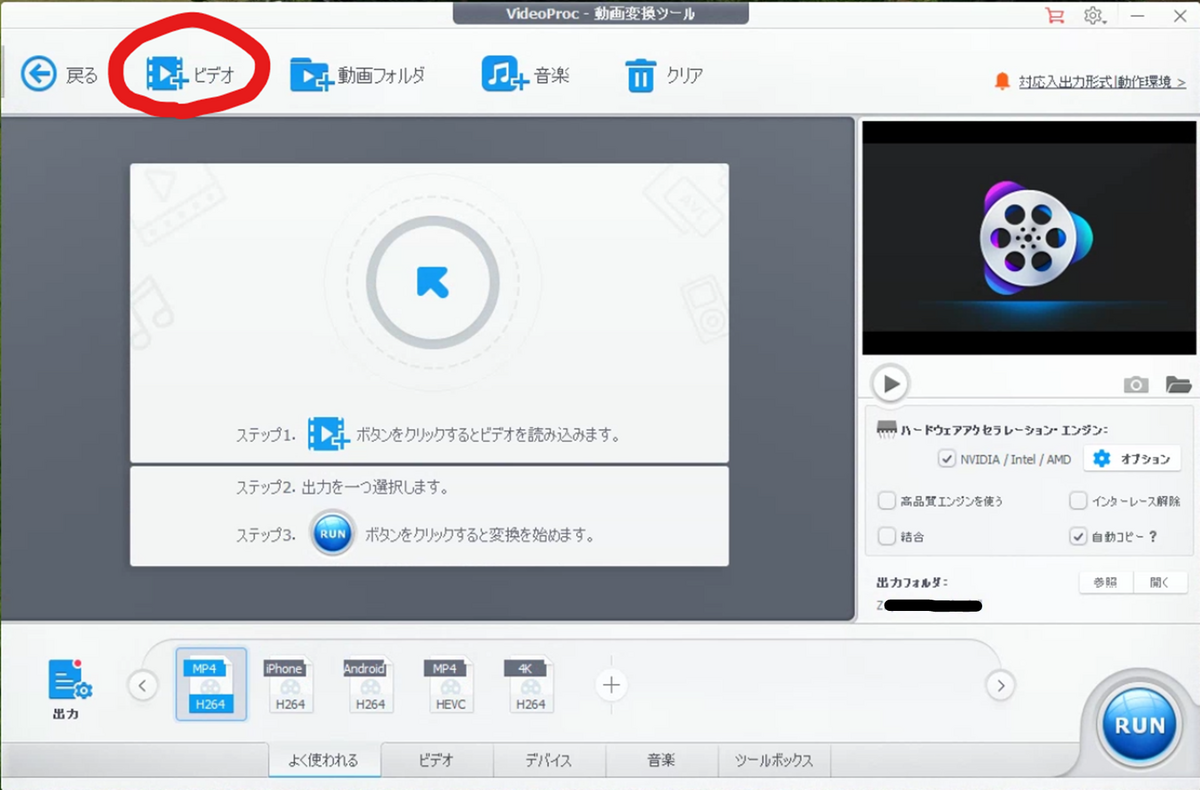
Select "ビデオ"

Select "ビデオ" to open a video for processing
Select a video and click "open"

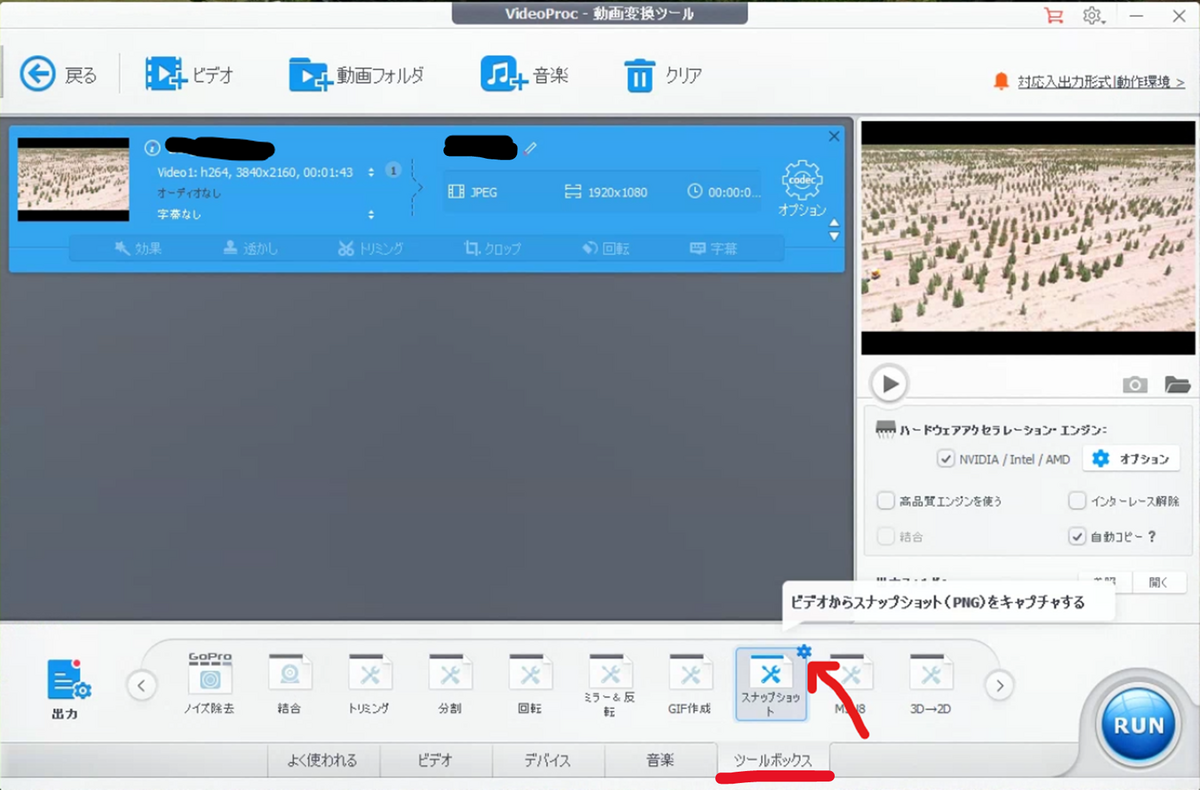
move to "ツールボックス" and select "スナップショット"
You can change the options for image extraction from "オプション" here

In most cases, Size of images can be set to "元と同じ" meaning the same as the original.
The number of images to be extracted should be set as required to develop the 3D model.
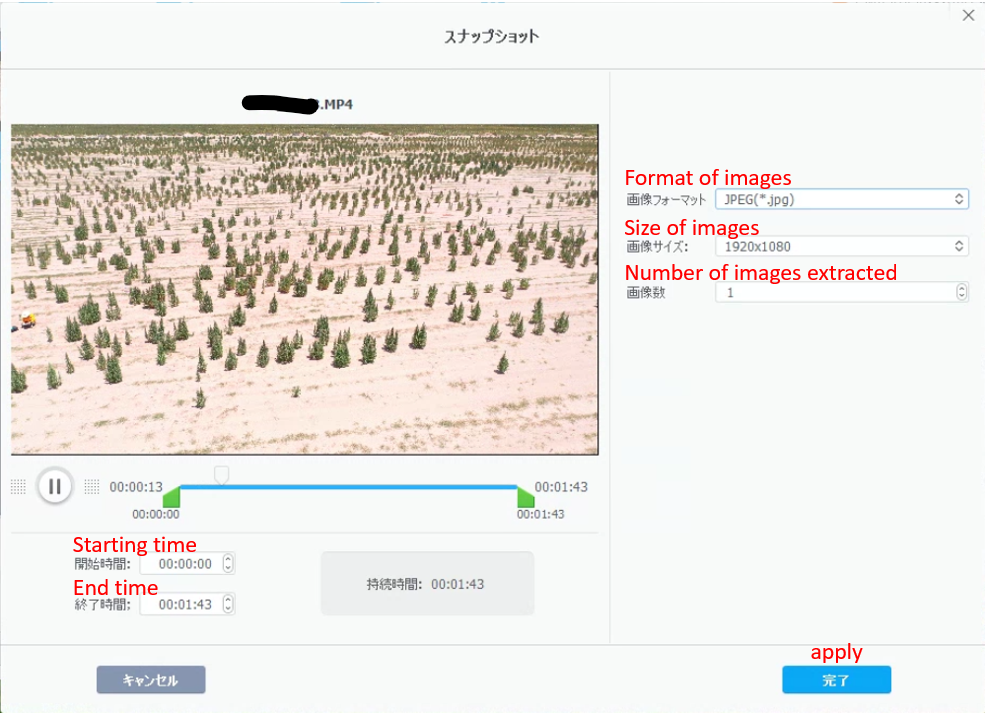
click "参照" to change the folder for extracted images.
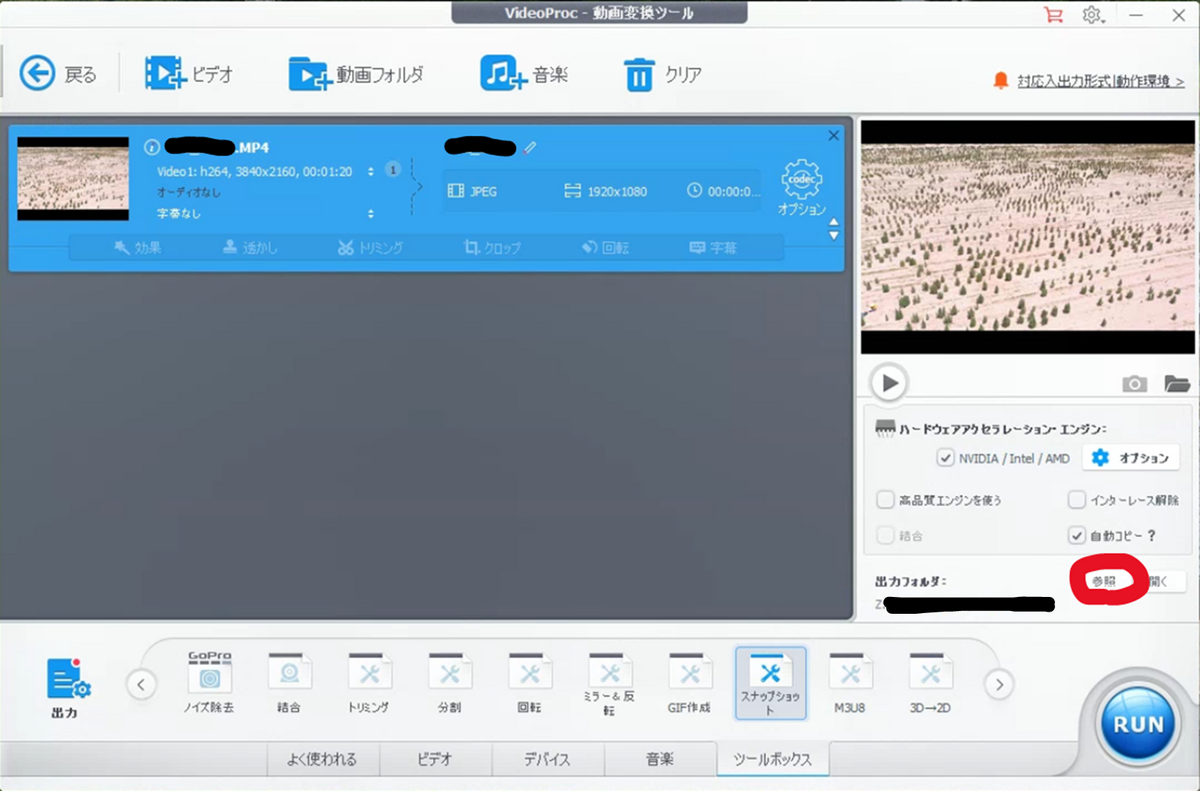
click "RUN"

click "次へ"
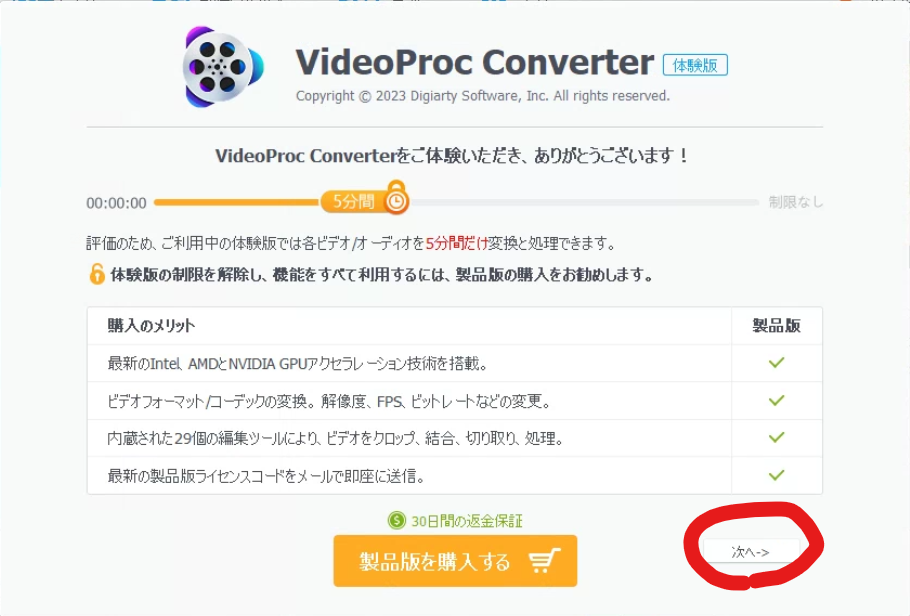
The following screen will be displayed until the conversion starts and finishes.
- Do not check the upper checkbox. If checked, the PC will shut down after processing.

- Do not check the upper checkbox. If checked, the PC will shut down after processing.
Then the extracted images are stored in the folder named the same as the original video in the selected folder.